GR User Forum
You are using an out of date browser. It may not display this or other websites correctly.
You should upgrade or use an alternative browser.
You should upgrade or use an alternative browser.
NEW: 2,8 / 35mm Pancake for GXR M
- Thread starter olyz
- Start date
zmix":t2p0klqs said:Excellent Kuuan..
Let us know how you figure out the registration distance and centering / axial centering...!!
well, just be trying out if it focuses to infinity and centering by eye judgement
")
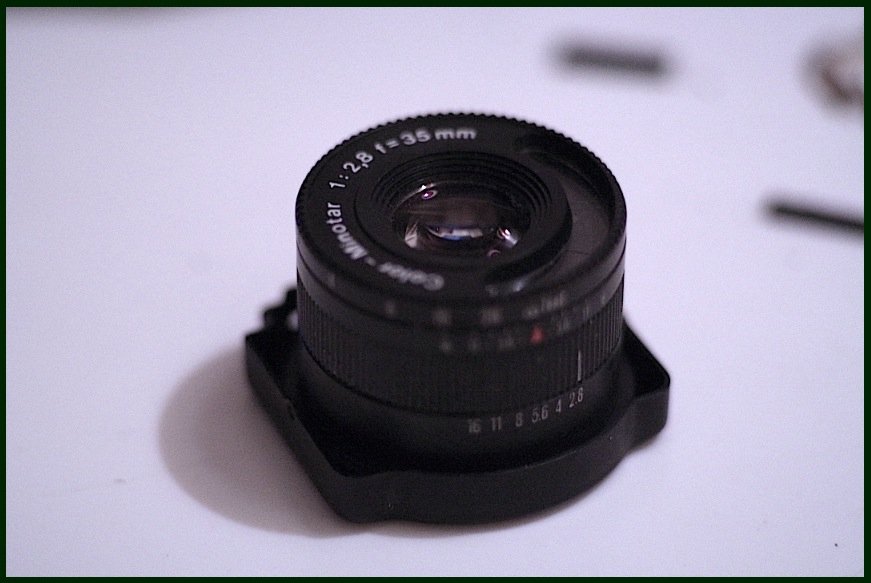
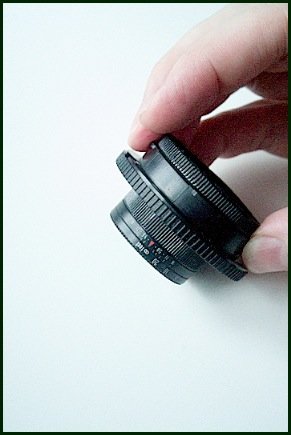
yesterday the M body cap arrived and immediately I put myself to adapt the lens.
here the result:


to reach infinity the lens had to be recessed inside the body cap, as already expected. For the aperture ring to still be manageable I cut out the body cap as big as I could ( this was done with minimal tools and it shows. Once I have access to tools I may try to smoothen that cut ) To hold the lens in place I used a hard rubber ring from a hard rubber piece I happened to have which by chance had exactly the right diameter to to squeeze into the rear opening on the body cap.

I did not cut the rear cover of the lens 'box' as I had planned to but instead substituted the rear cover by piece of plastic I cut
first test shots,
note that for these samples I increased contrast, specially upped blacks considerably in PP:


first impression:
low contrast, if used against light veiling flare, lovely colors, average sharpness
in short: it looks more 'vintage' than I had expected, interesting lens to play with
note that for these samples I increased contrast, specially upped blacks considerably in PP:
first impression:
low contrast, if used against light veiling flare, lovely colors, average sharpness
in short: it looks more 'vintage' than I had expected, interesting lens to play with
olyz":1kh4px44 said:Exciting pictures kuuan, congrats on your success!
Shooting against light: try out a black cardboard with a punch hole (diameter of 6 mm) and set it in front of the lens!
Christian
thank you Christian.
these are really just shots trying out the lens..
I wonder if there are variations of the Minotar with difference in coating. Mine certainly easily has veiling flare, it's low contrast hardly makes focus peaking work.
This it how it looks like without PPing when shot during day and that not against a strong light but just a cloudy sky of a late rainy afternoon: ( all samples no PPing other than sharpening after resize )

in comparison shot towards same direction with the CV Wide Heliar f4.5/15

or here, light of low sun behind clouds comes from the right:

now using my hand as a shade:

I plan to make a hood for it which will help in cases as this last pic but I am afraid it won't help much in a case like the first sample.
strictly avoiding direct light:

cheers, Andreas
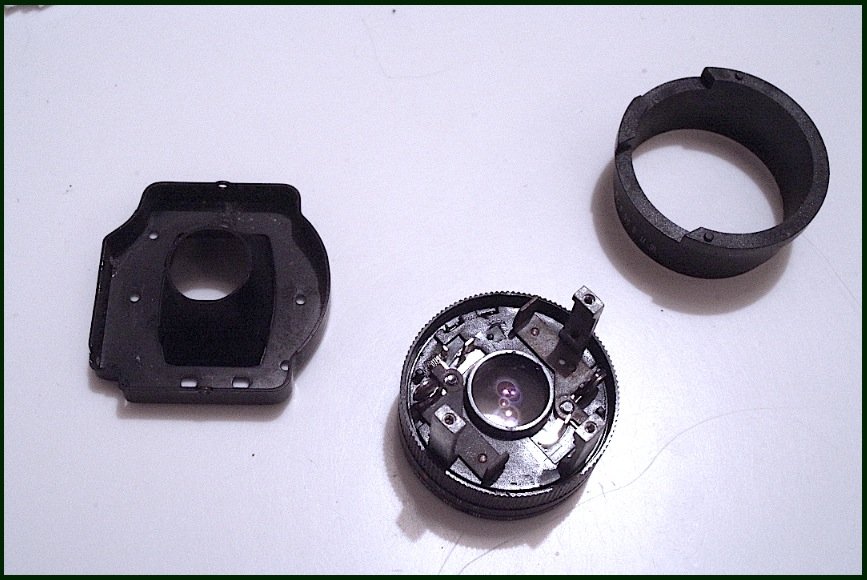
I got a Minox GL in the mail today and began my own experiment:
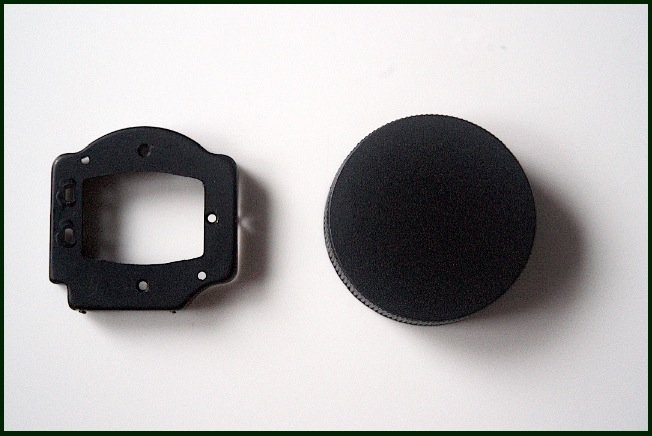
First, I disassembled the camera by removing every screw I could locate:
These are the only three pieces of the camera I'm interested in for this experiment:
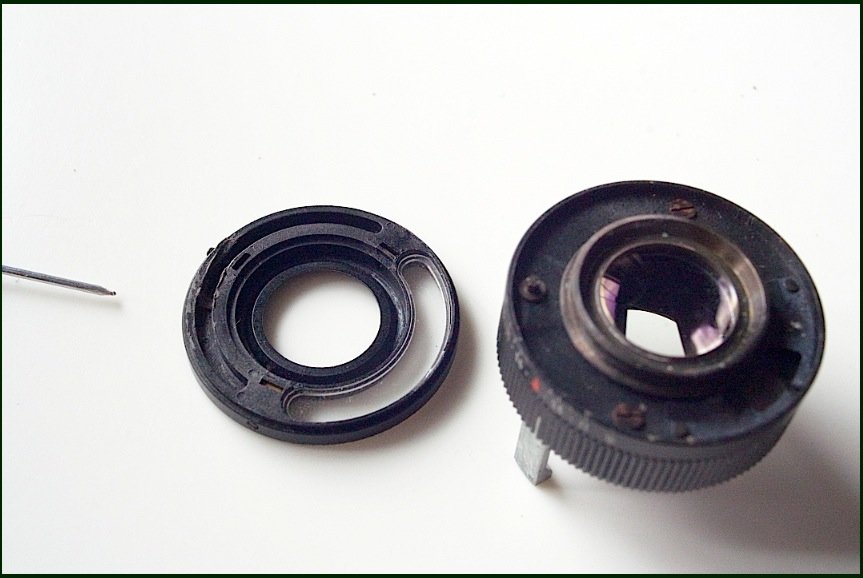
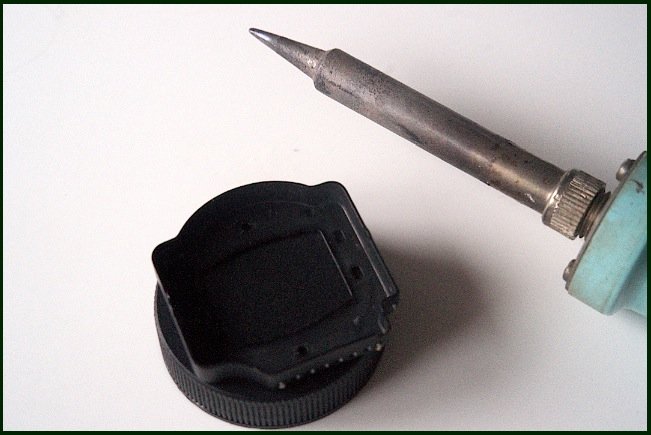
I removed all the shutter solenoids, springs and meter wiring from the rear of the lens itself, and latched the shutter in the "open" position:
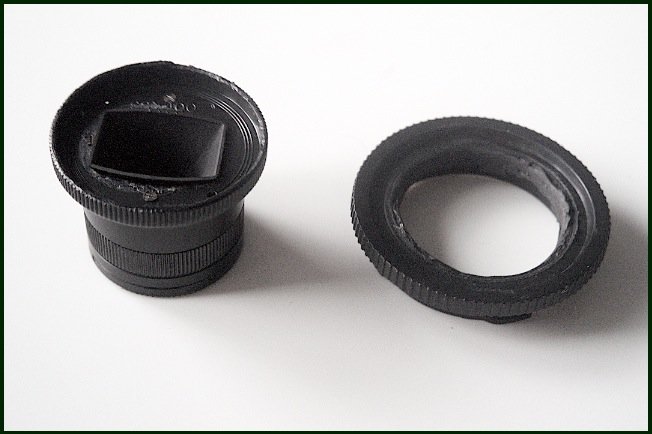
Finally I screwed the three lens pieces back together:
As soon as my spare M body cap arrives, I'll experiment with mounting it to the camera.....
First, I disassembled the camera by removing every screw I could locate:
These are the only three pieces of the camera I'm interested in for this experiment:
I removed all the shutter solenoids, springs and meter wiring from the rear of the lens itself, and latched the shutter in the "open" position:
Finally I screwed the three lens pieces back together:
As soon as my spare M body cap arrives, I'll experiment with mounting it to the camera.....
Attachments


great zmix, looking very good
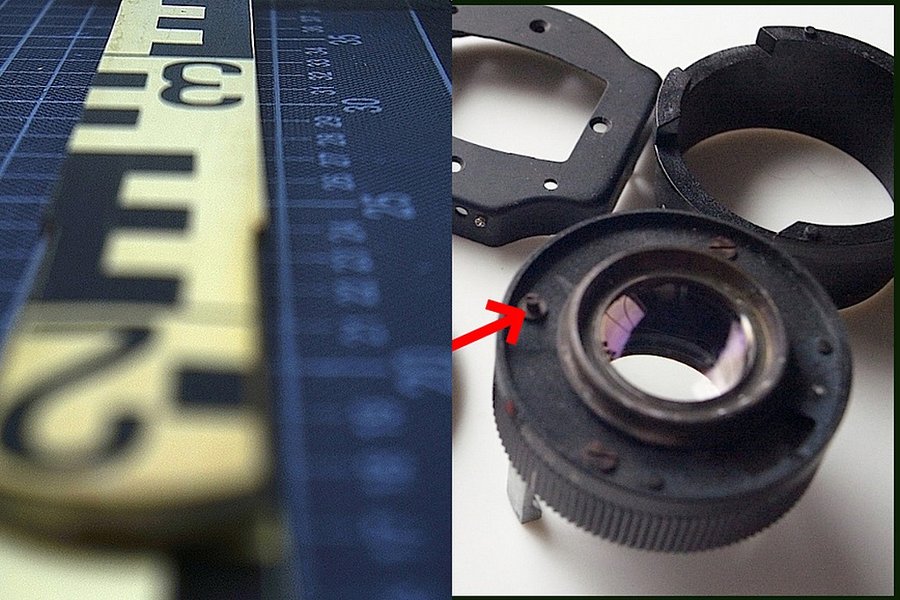
you will have noticed that for the lens to reach infinity focus it must be put half 'inside' the M mount and that it hardly fits because of the protruding corners of the rear part.
As seen I replaced it, improvising, I am kind of traveling, doing this out of the suitcase, with a piece cut from a thin but strong plastic ( container ). It makes the conical black rear cover click in like on the original, and put duct tape on top to make it black
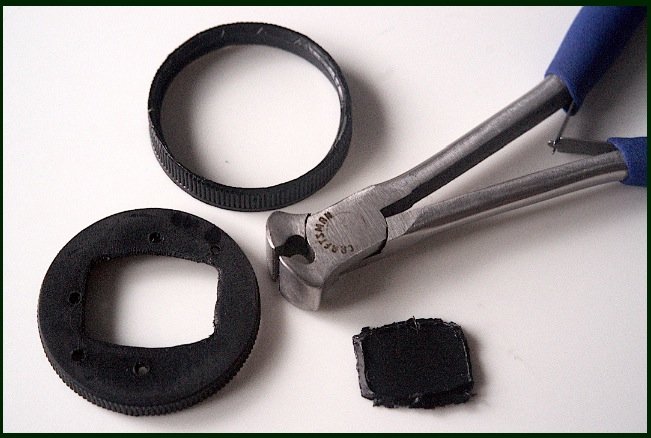
I was thinking that I could reverse the rear piece in order to avoid cutting it as Kuuan described.
I found that it couldn't be reversed without affecting the orientation of the internal guide from Horizontal to Vertical.
Here's an interesting discovery... I removed the focus ring at the front of the lens (which is only held in place by three set screws). You can see in the photo below that the focus limit pin runs along a trough in the rear of the ring itself, but note that there is additional "trough" and it is interrupted by a small "wall" (indicated here by the tip of the small screwdriver):
I heated up a small screwdriver and melted through this wall, extending the close focus range. I have not tested this yet, but it looks like it might have extended the close focus from 1M to 0.5M..:
Note that the focus range is set by the focus limit pin controlling the amount of rotation applied to the front element and that the front element can be adjusted arbitrarily before the set screws in the focus ring are tightened. Therefor, it may be possible to tweak the infinity focus point after the lens is mounted.
Attachments


olyz":1adwcvo1 said:nice to watch you at work zmix
I removed the focus limit pin for focussing to 30 cm -
but beware: do not unscrew the lens!
Christian
Thanks Christian.
I did some preliminary tests on my as yet unmounted lens and I discovered that with the extended focus range I can get as close as 0.42 ~ 0.45m, with no danger of unscrewing the front element..!
You might want to replace your focus limit pin and try my modification instead..!
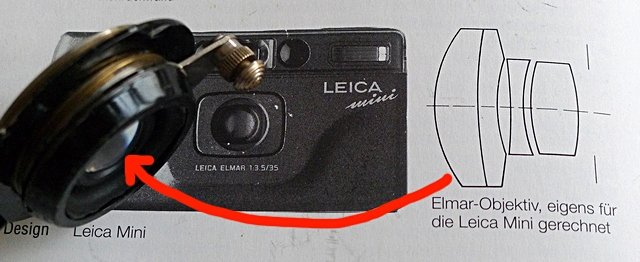
A pancake with the lens of a broken Leica Mini II
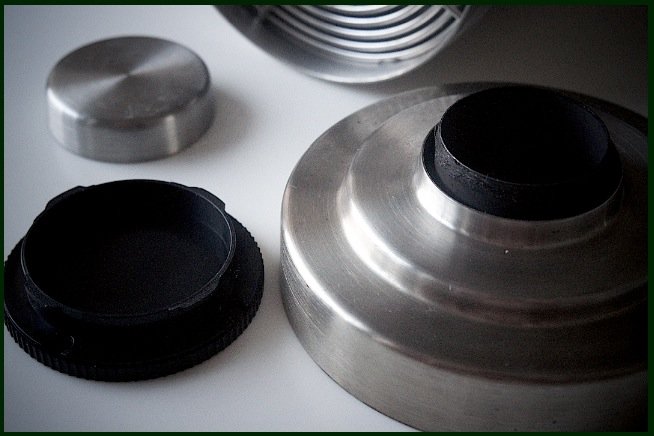
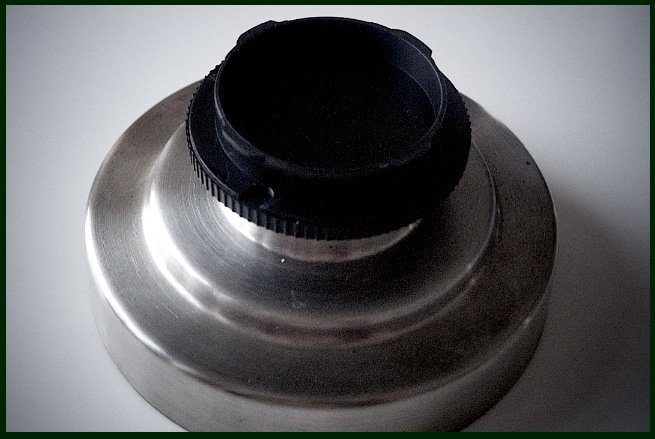
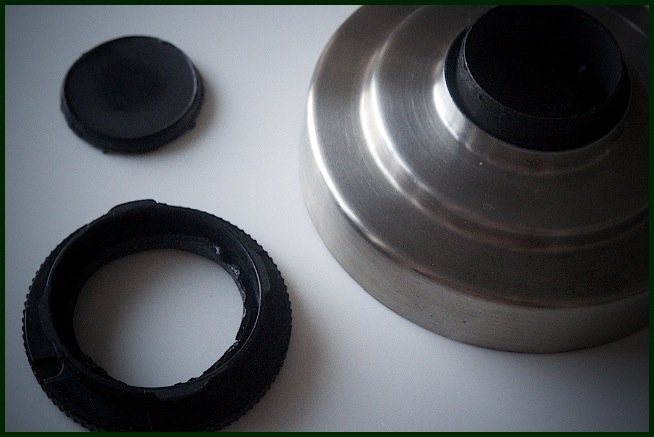
This requires a worm gear for focusing: Therefore I 'beheaded' an old Elmar 5 cm (from the 30s, these are not rare) and replaced its lens by the very much smaller Elmar 35mm from the broken 1995 mini with hard rubber rings and some glue.
A pinhole aperture can be attached to the back of the lens with tape.
Certainly one can use other lenses, perhaps from the Olympus XA-series(?).
What remains is a high performance magnifying glass.
Christian
Attachments
-
 EXIFElmar to Elmar_.jpg98.7 KB · Views: 784
riccadonna
Member
Cool idea Christian. I have Industar 50/3.5 collapsible, a russian Elmar copy, which is not as good as original Elmar also in my possesion. I will use it for similar experiment. By the way, you know there are many half-frame cameras with excellent lenses that cover APS-C. Mine favorite were Olympus Pen D ones.
Using the original lens mount as a guide, I cut a new mounting plate from the lid of a vitamin bottle:
Attachments
Ricohfanboy
New Member
Well, I don't know whether it's possible mechanically -- or whether you're gonna scold me for abusing a Ricoh: But what about the lenses from the Ricoh FF-1? Given that the FF-1 is very nearly a Minox clone (hiss! boo!), can anyone comment on using on of those?
after the first few sample pics I had been disappointed on how it handled strong light. But that was on the streets of Saigon, the sunlight is strong here, during day I have had troubles with other lenses that don't have top coatings as well.
so it had taken me a while to give it another try, today I brought it along to show it to a photographer friend, then I took this one which tells me that this little lens is very useable after all

click on image to view larger, resp. the original size here: http://www.flickr.com/photos/kuuan/9433048445/sizes/o/in/photostream/
cheers, andreas
so it had taken me a while to give it another try, today I brought it along to show it to a photographer friend, then I took this one which tells me that this little lens is very useable after all
click on image to view larger, resp. the original size here: http://www.flickr.com/photos/kuuan/9433048445/sizes/o/in/photostream/
cheers, andreas